Create Admin Group and Admin User
Creating an Admin Group
-
Log in to the Control Panel on the AWS Web Service page.
-
Click on your account name at the top right corner and select My Security Credentials.
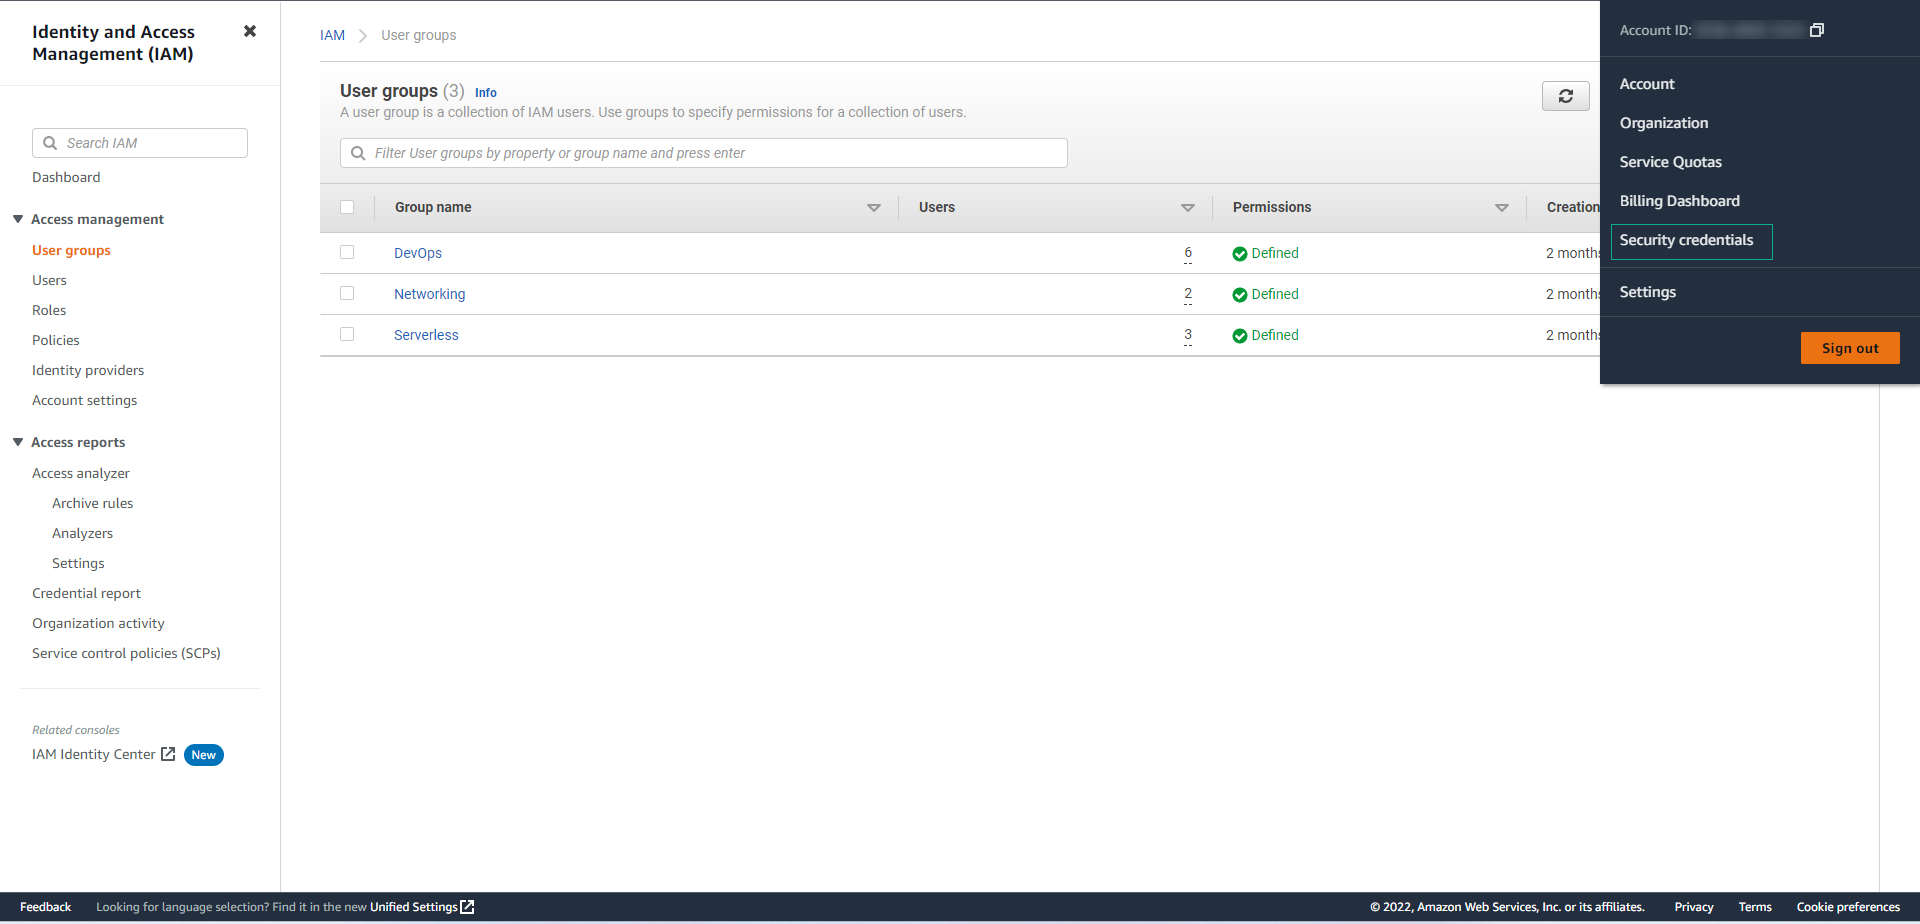
Note: If you don’t see the My Security Credentials menu, you can click on the search icon and type IAM. Then click on the IAM service to access the IAM management interface.

-
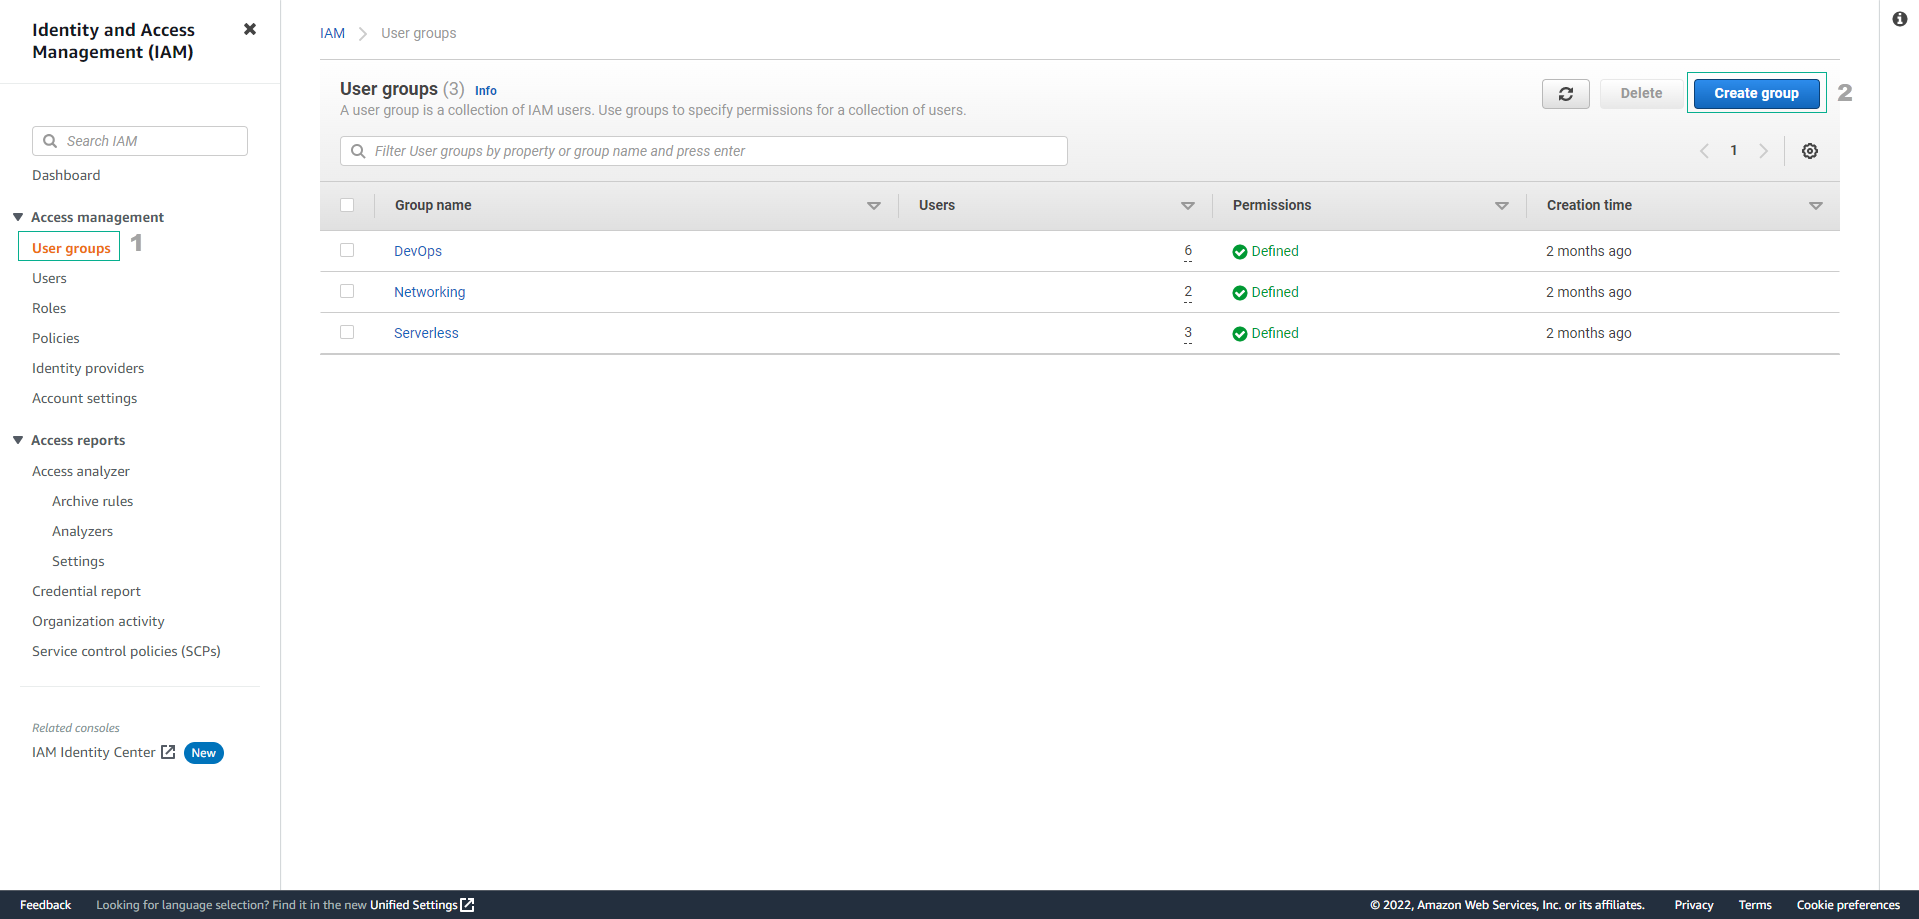
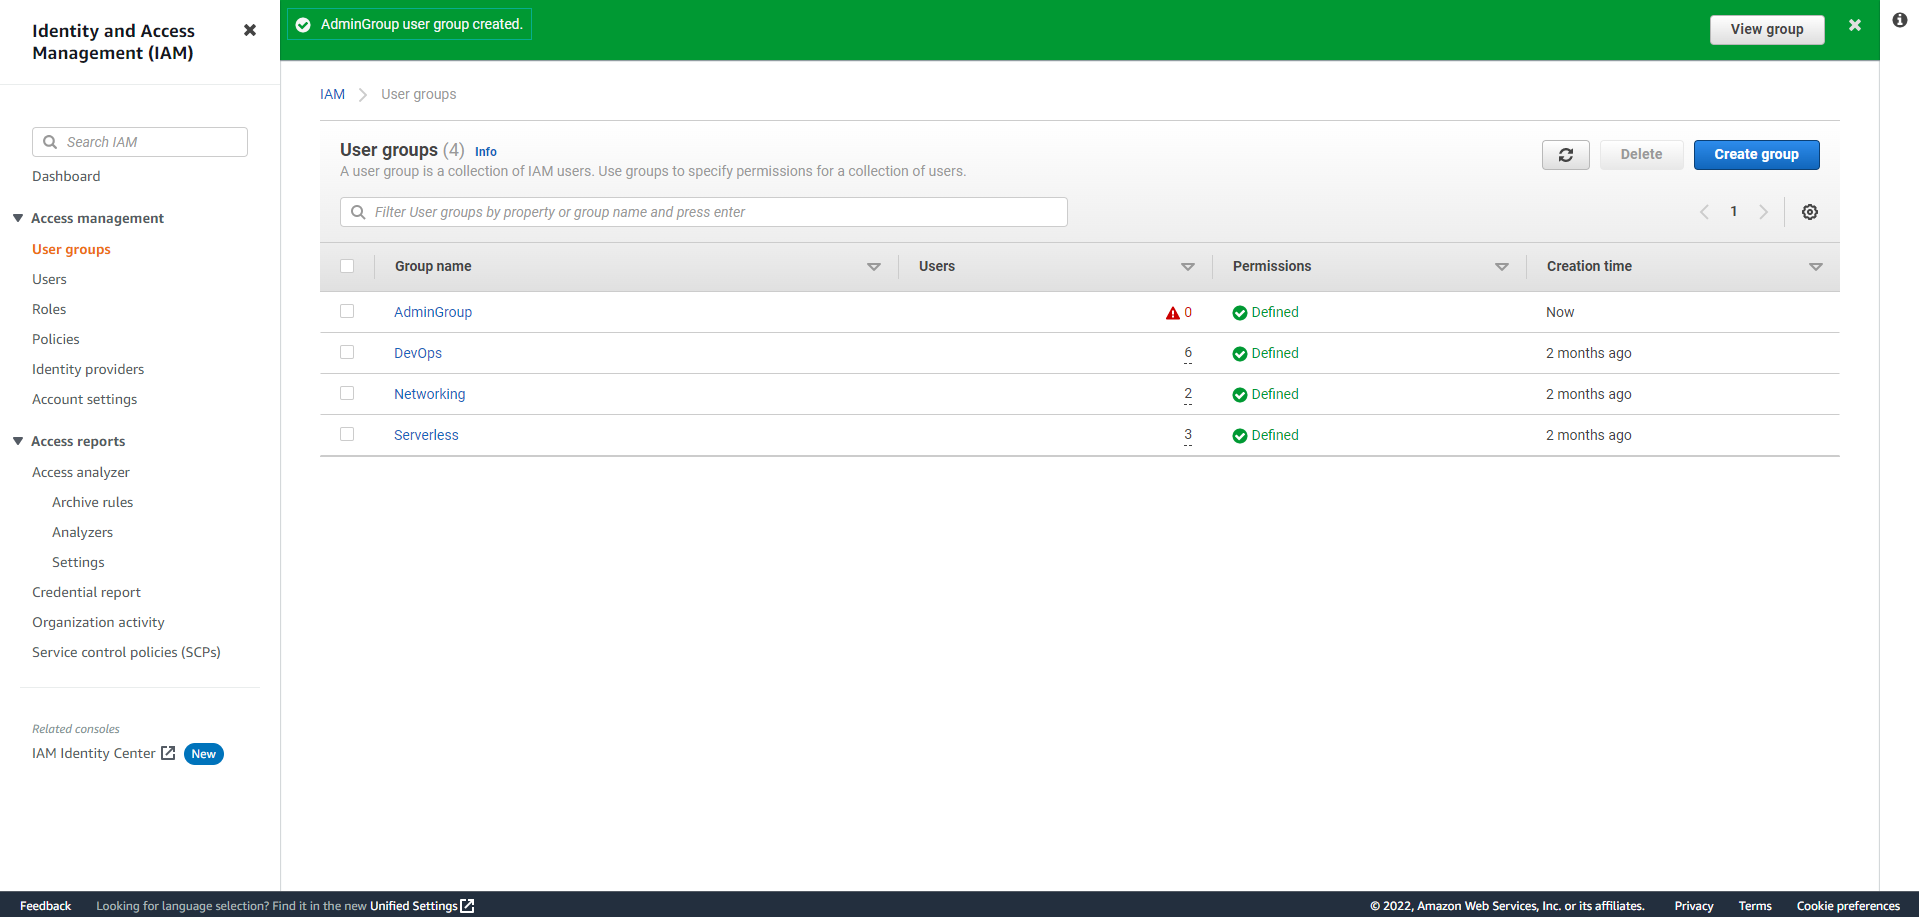
On the left sidebar, choose User Groups, and then select Create Group.
-
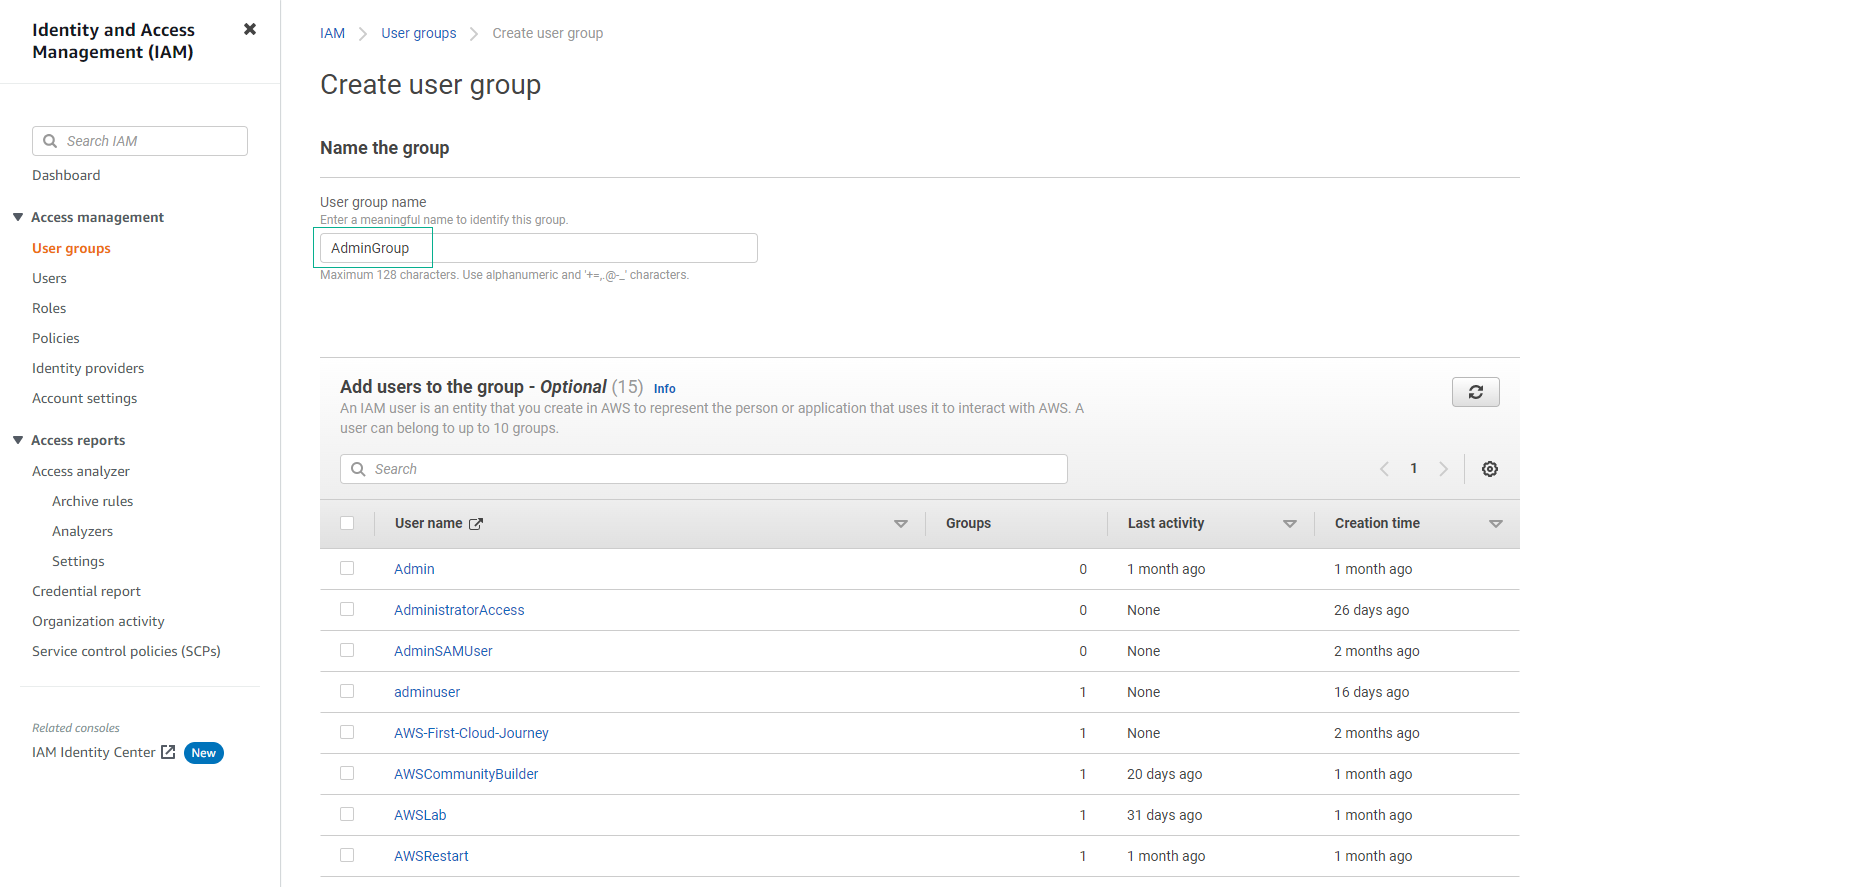
Under the Name the group section, enter the Group name (For example: AdminGroup), and scroll down.
-
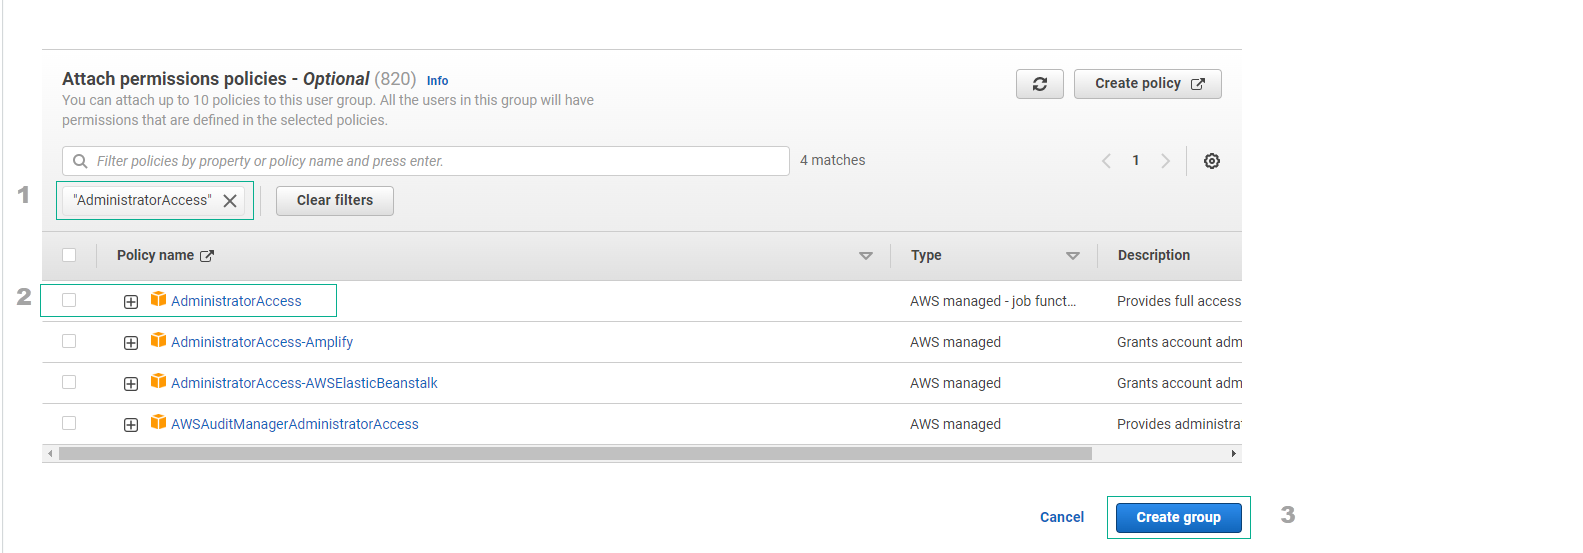
In the Attach permissions policies section, type AdministratorAccess in the search bar and select it. Finally, click on Create Group.
-
The creation of the admin group is complete.
Create Admin User
You can use the AWS Management Console to create IAM users.
-
Follow the sign-in procedure appropriate to your user type as described in the topic How to sign in to AWS in the AWS Sign-In User Guide.
-
On the Console Home page, select the IAM service.
-
In the navigation pane, select Users, and then select Add users.
-
On the Specify user details page, under User details, enter the new user’s name in the User name field. This will be their sign-in name for AWS.
Note: User names can be up to 64 letters, digits, and certain characters: plus (+), equal (=), comma (,), period (.), at sign (@), underscore (_), and hyphen (-). User names must be unique within an account, and they are case-sensitive when used in policies or ARNs. However, they are case-insensitive during the sign-in process.
-
Select Provide user access to the AWS Management Console. This generates AWS Management Console sign-in credentials for the new user.
-
You’ll be asked whether you’re providing console access to a person. It’s recommended to create users in IAM Identity Center rather than IAM. To switch to creating the user in IAM Identity Center, select Specify a user in Identity Center.
- If IAM Identity Center is not enabled, this option takes you to the service page in the console to enable it.
- If IAM Identity Center is enabled, this option takes you to the Specify user details page in IAM Identity Center.
If you cannot use IAM Identity Center, select I want to create an IAM user and continue following this procedure.
-
For Console password, choose one of the following:
- Autogenerated password: The user gets a randomly generated password that adheres to the account password policy. You can view or download the password on the Retrieve password page.
- Custom password: Assign a password that you enter in the box.
Optionally, select Users must create a new password at next sign-in (recommended) to ensure the user changes their password the first time they sign in.
-
Select Next.
-
On the Set permissions page, choose how to assign permissions for this user:
- Add user to group: Assign the user to one or more groups with existing permissions policies.
- Copy permissions: Copy permissions from an existing user with similar needs.
- Attach policies directly: Attach AWS managed or custom policies directly to the user.
It’s recommended to attach policies to groups whenever possible.
-
Optionally, set a permissions boundary in the Permissions boundary section. This is an advanced feature that controls maximum permissions.
-
Select Next.
-
Optionally, on the Review and create page, under Tags, you can attach metadata to the user using key-value pairs.
-
Review your choices, and when ready, select Create user.
-
On the Retrieve password page, get the password assigned to the user:
-
Select Show next to the password to view it manually.
-
Select Download .csv to save the user’s sign-in credentials as a .csv file.
-
Select Email sign-in instructions to customize and send an email to the user. The email includes their user name and a URL to the account sign-in page:
User name
URL: https://AWS-account-ID-or-alias.signin.aws.amazon.com/console
Note: The user’s password is not included in the email.
If the user also requires access keys, refer to Managing access keys for IAM users.
Login to AdminUser
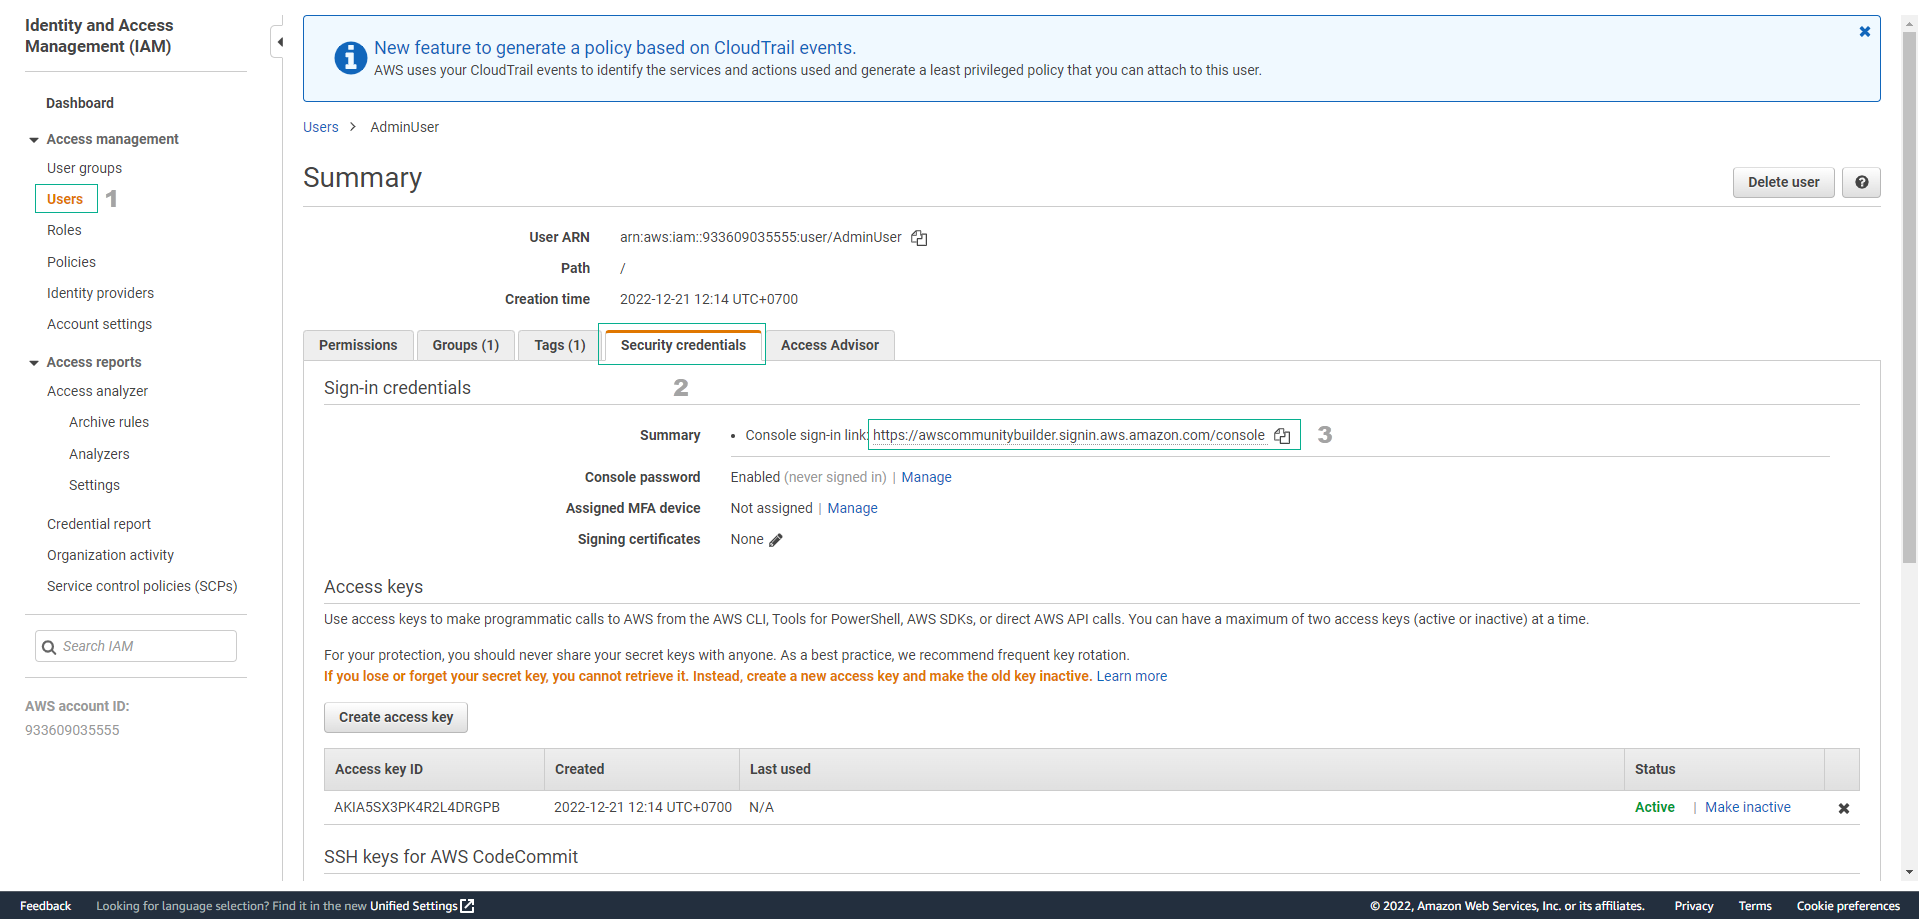
- Return to the IAM service, and select Users in the left sidebar.
- Click on the name of the IAM User you just selected.
- In the Summary section, select the Security credentials tab. Look at the line Summary: Console sign-in link and copy the link next to it. This is the link you use to log in to the IAM User.
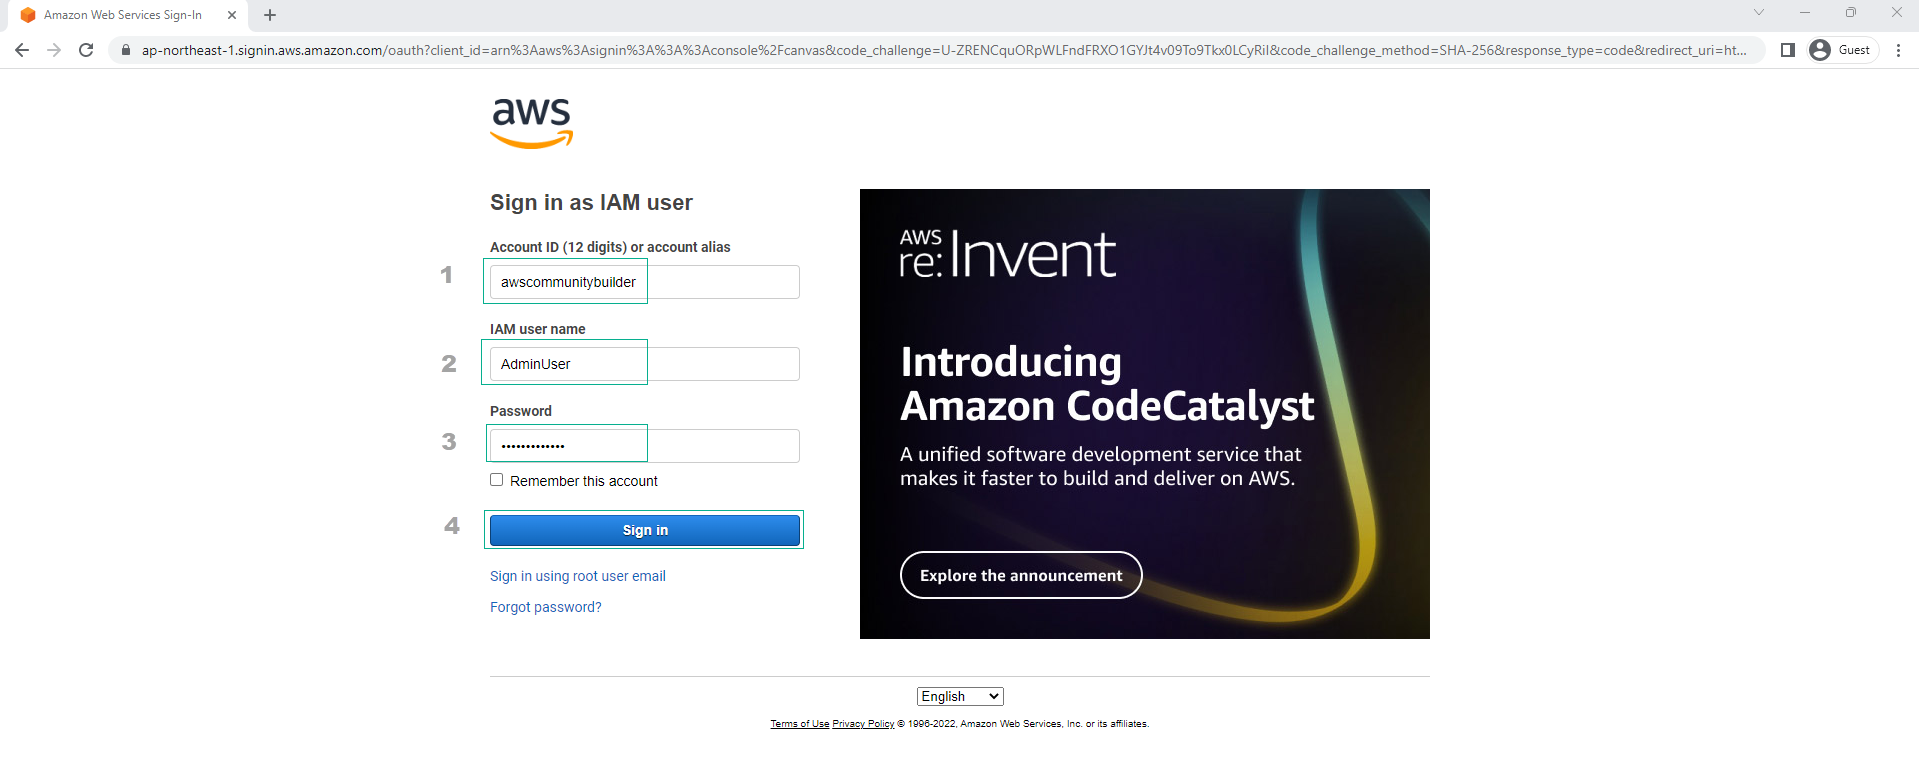
- Open an incognito tab of the browser you are using and paste the link into the search bar.
Incognito tab login allows you to log in to AWS with an IAM User without having to log out of the root user in the main tab.
- Enter the correct IAM User name and password that you entered in the create IAM User section above. Click sign in.
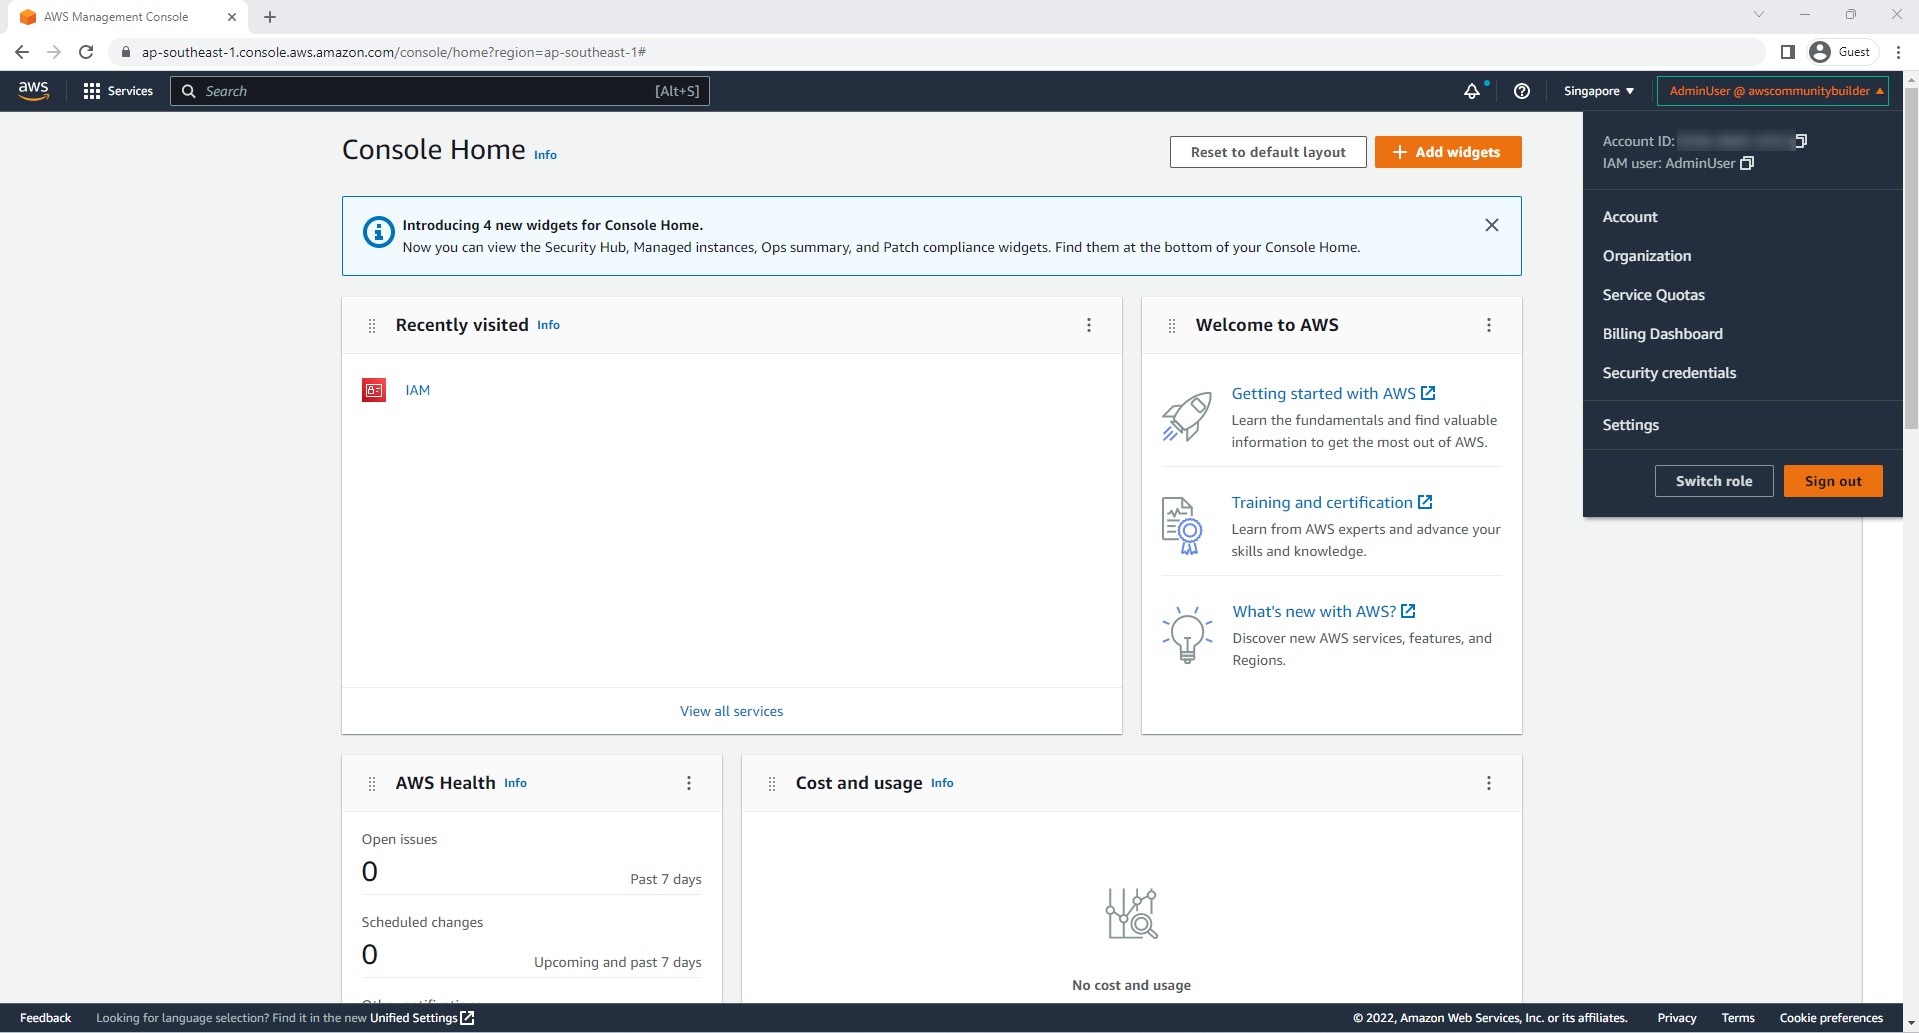
- Congratulations, you have successfully accessed your account as an IAM User AdminUser.

- In The next step, we will switch to using IAM Role to improve the security of your account.
Creating Access Key for AWS Root User
Minimum Required Permissions
To perform the following steps, you need at least the following IAM (Identity and Access Management) permissions:
-
You must log in as the root user of AWS, which does not require any additional IAM permissions. These steps cannot be performed as an IAM user or a role.
-
Use the email address and password of your AWS account to sign in to the AWS Management Console as the root user.
-
In the top-right corner of the console, select your account name or number, then choose “Security Credentials”.
-
Under “Access keys,” select “Create access key.” If this option is unavailable, it means you have the maximum number of access keys. You must delete one of the existing access keys before creating a new one. For more information, see IAM Object Quotas in the IAM User Guide.
-
On the “Alternatives to root user access keys” page, consider security recommendations. To proceed, check the box and then select “Create access key.”
-
On the “Retrieve access key” page, your Access Key ID will be displayed.
-
Under the “Secret access key” section, select “Show,” then copy the Access Key ID and Secret Key from your browser window and paste them into a secure location. Alternatively, you can select “Download .csv file” to download a file named “rootkey.csv” containing the Access Key ID and Secret Key. Keep the file in a secure location.
-
Select “Done.” When you no longer need the access key, we recommend either deleting it or at least considering disabling it to prevent misuse.
Note: These steps apply only to the root user account on AWS. For IAM users or roles, the process of creating and managing access keys may differ.
Revoking Access Key for Root User on AWS
Minimum Permissions
To perform the following steps, you must have at least the following IAM (Identity and Access Management) permissions:
- You must be logged in as the root user of your AWS account, this does not require any additional AWS Identity and Access Management (IAM) permissions. You cannot perform these steps as an IAM user or a role.
- Use the email address and password of your AWS account to sign in to the AWS Management Console as the root user.
- In the top-right corner of the console, select your account name or number, then choose Security Credentials.
- Under Access keys, select the access key you wish to delete, then in the Actions section, choose Delete.
Note Alternatively, you can choose to Deactivate an access key instead of permanently deleting it. This allows you to continue using it in the future without changing both the key ID and secret key. While the key is deactivated, any requests using it in AWS API requests will fail with an “access denied” error.
In the Delete dialog, select Deactivate, enter the access key ID to confirm your intention to delete it, then choose Delete.