Virtual MFA Device
Enabling Multi-Factor Authentication (MFA) on AWS
Note: Before proceeding, ensure you are logged in to AWS using the root user.
Enable Virtual MFA Device through AWS Management Console
To enhance the security of your AWS account, you can set up Multi-Factor Authentication (MFA). This adds an extra layer of protection by requiring a second form of verification in addition to your password. Follow these steps to set up and activate a virtual MFA device:
-
Sign in to the AWS Management Console.
-
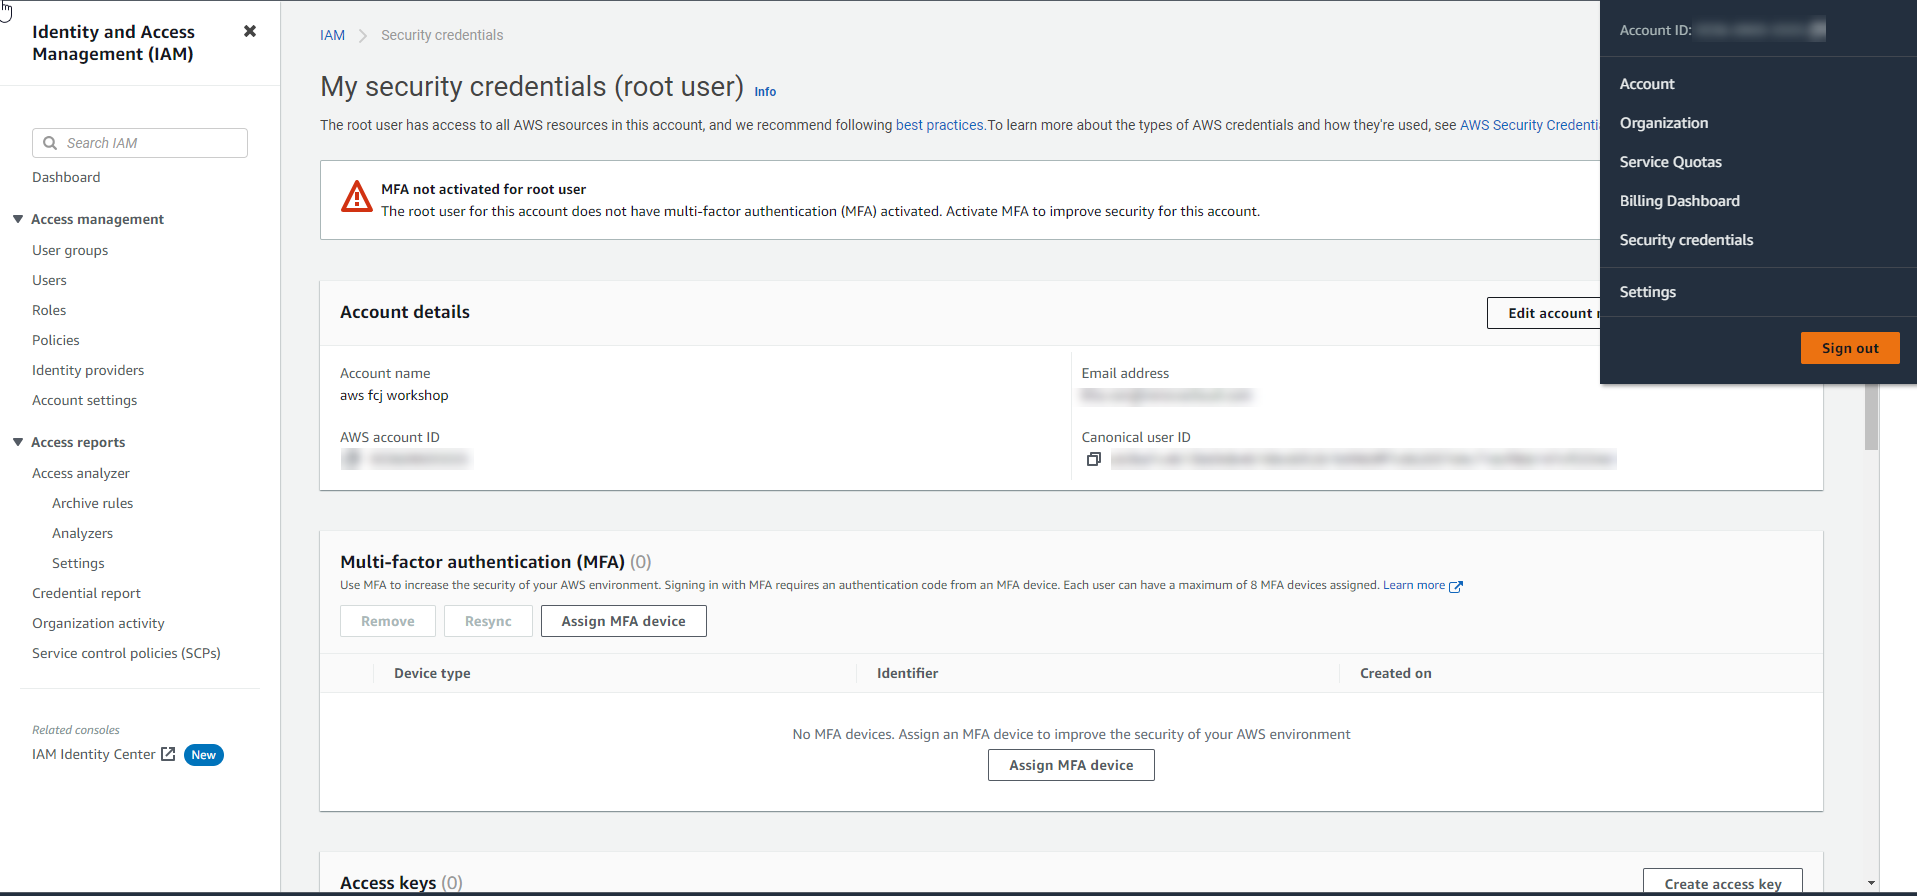
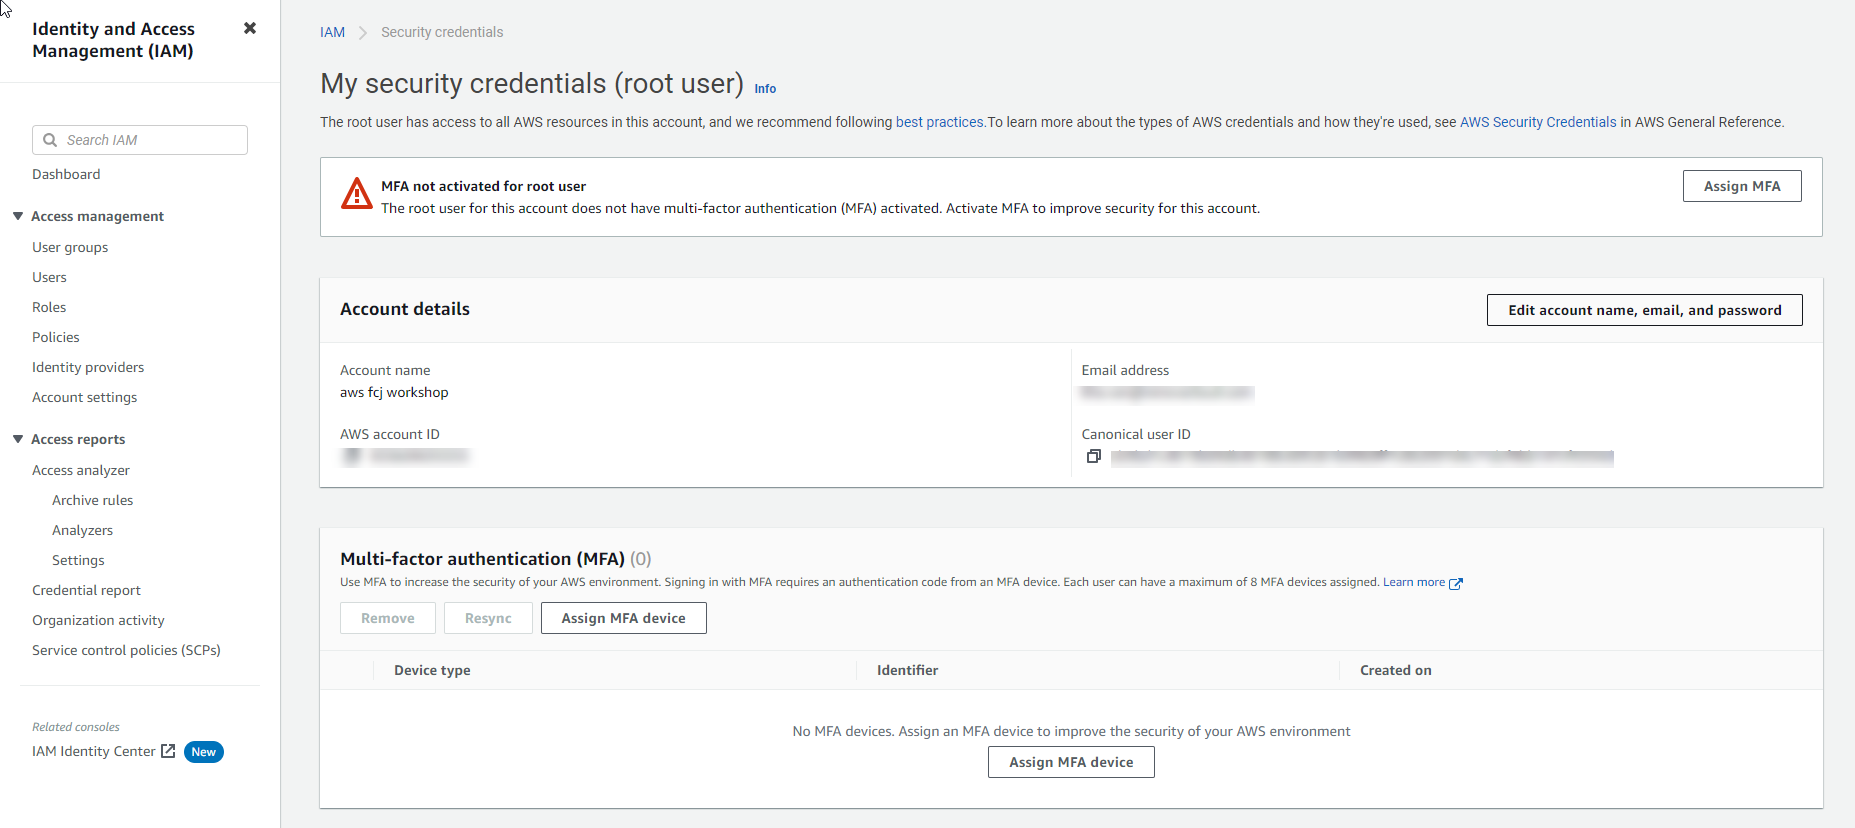
In the upper right corner of the console, you will see your account name. Click on it and select My Security Credentials.
-
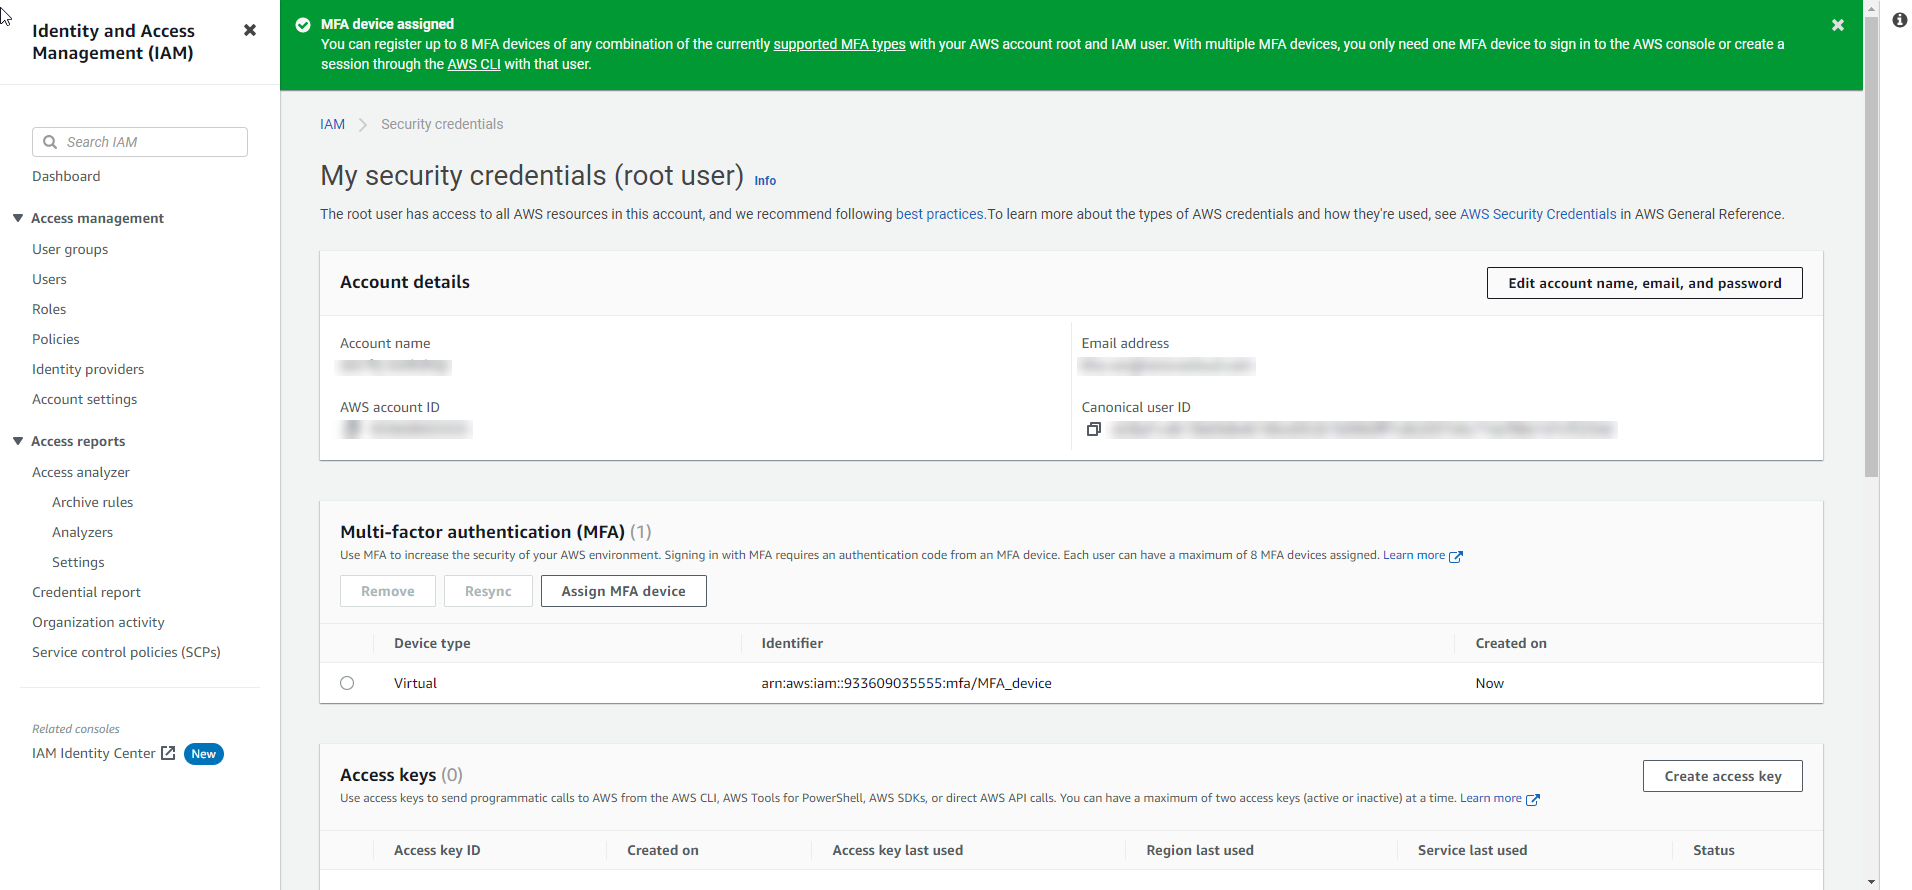
Expand the Multi-factor authentication (MFA) section and select Assign MFA.
-
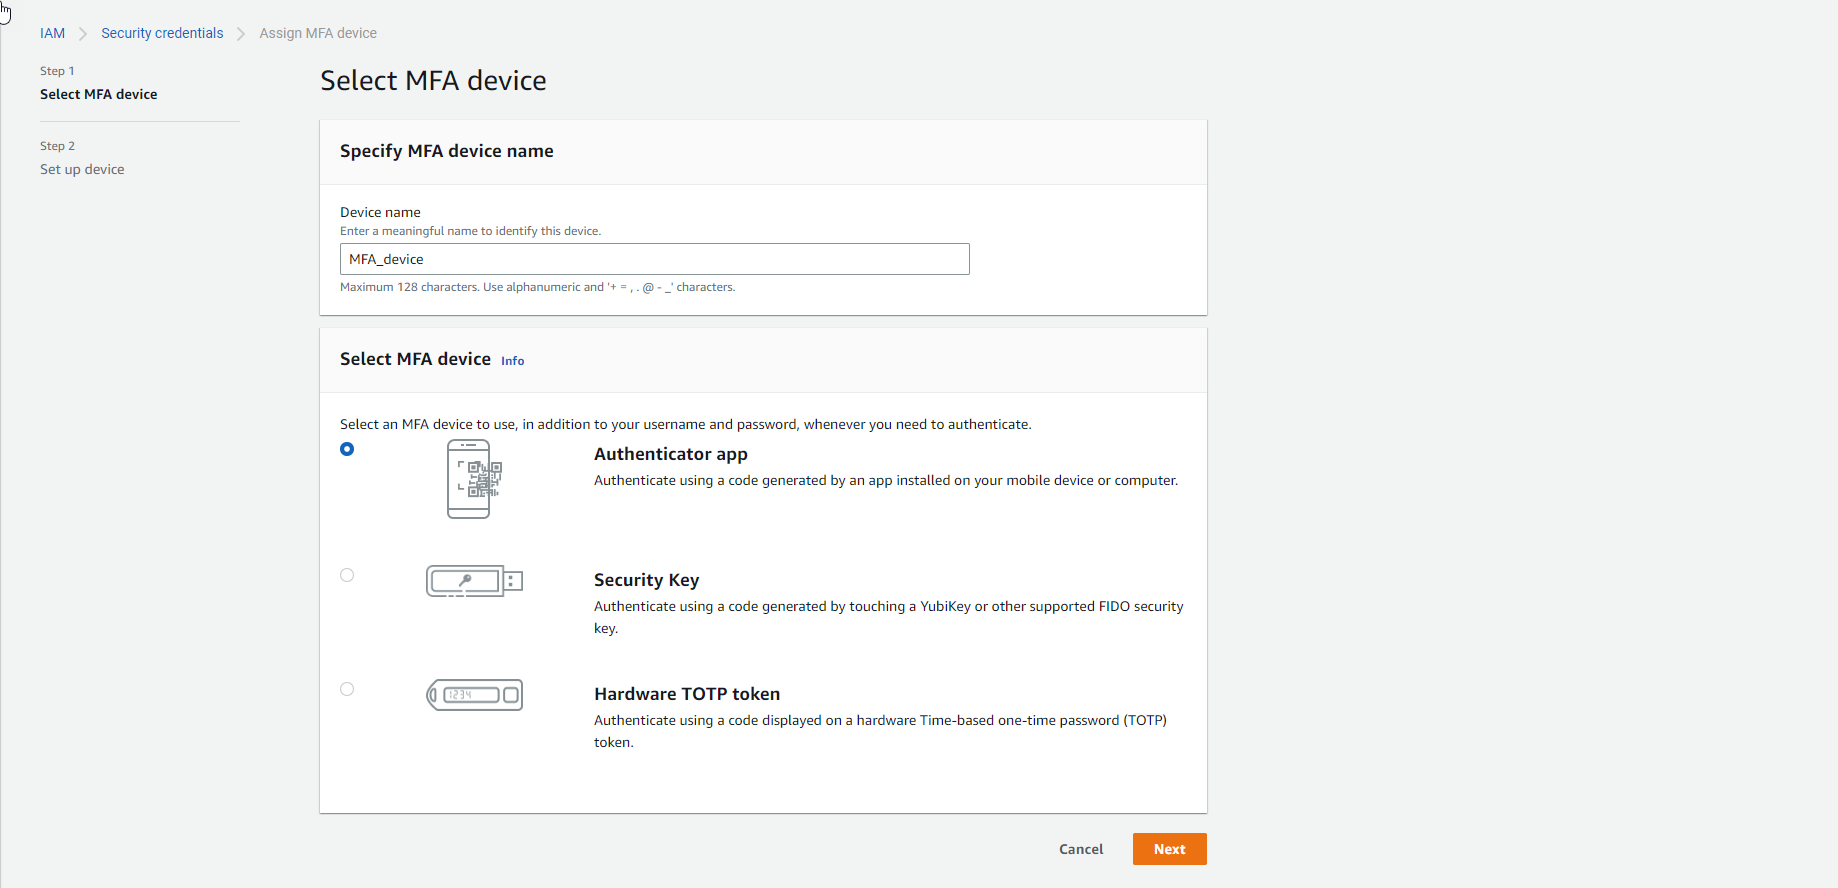
In the Select MFA Device interface:
- Enter a Device Name.
- Select MFA Device as the Authenticator App.
- Select Next.
-
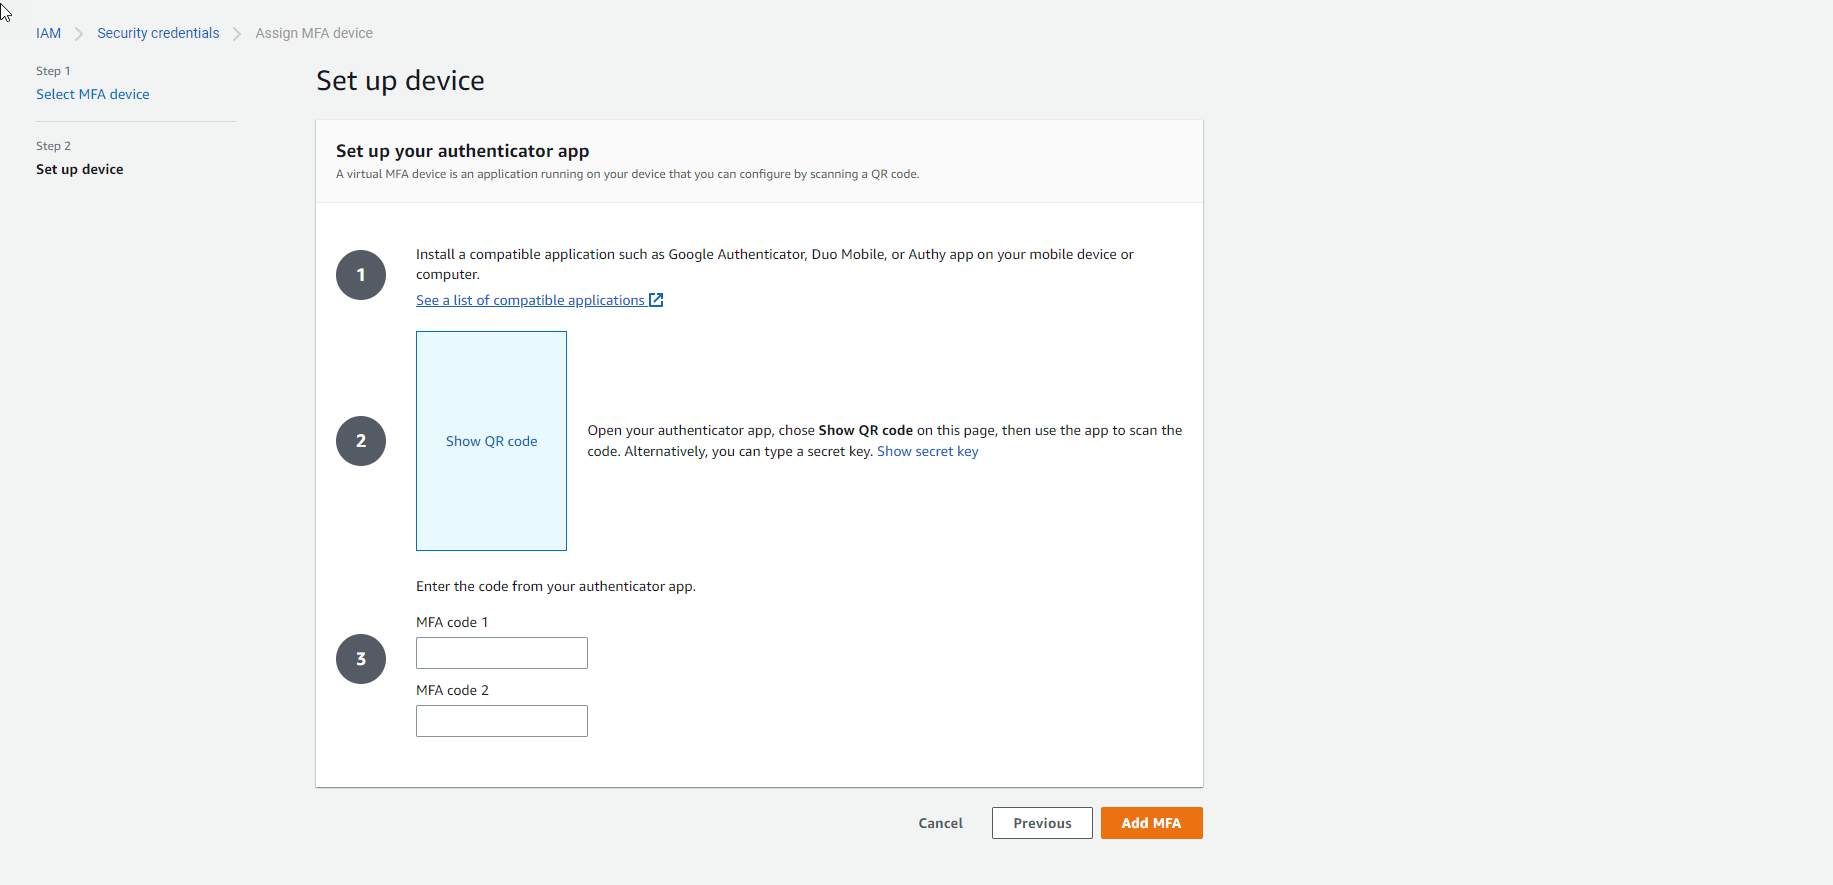
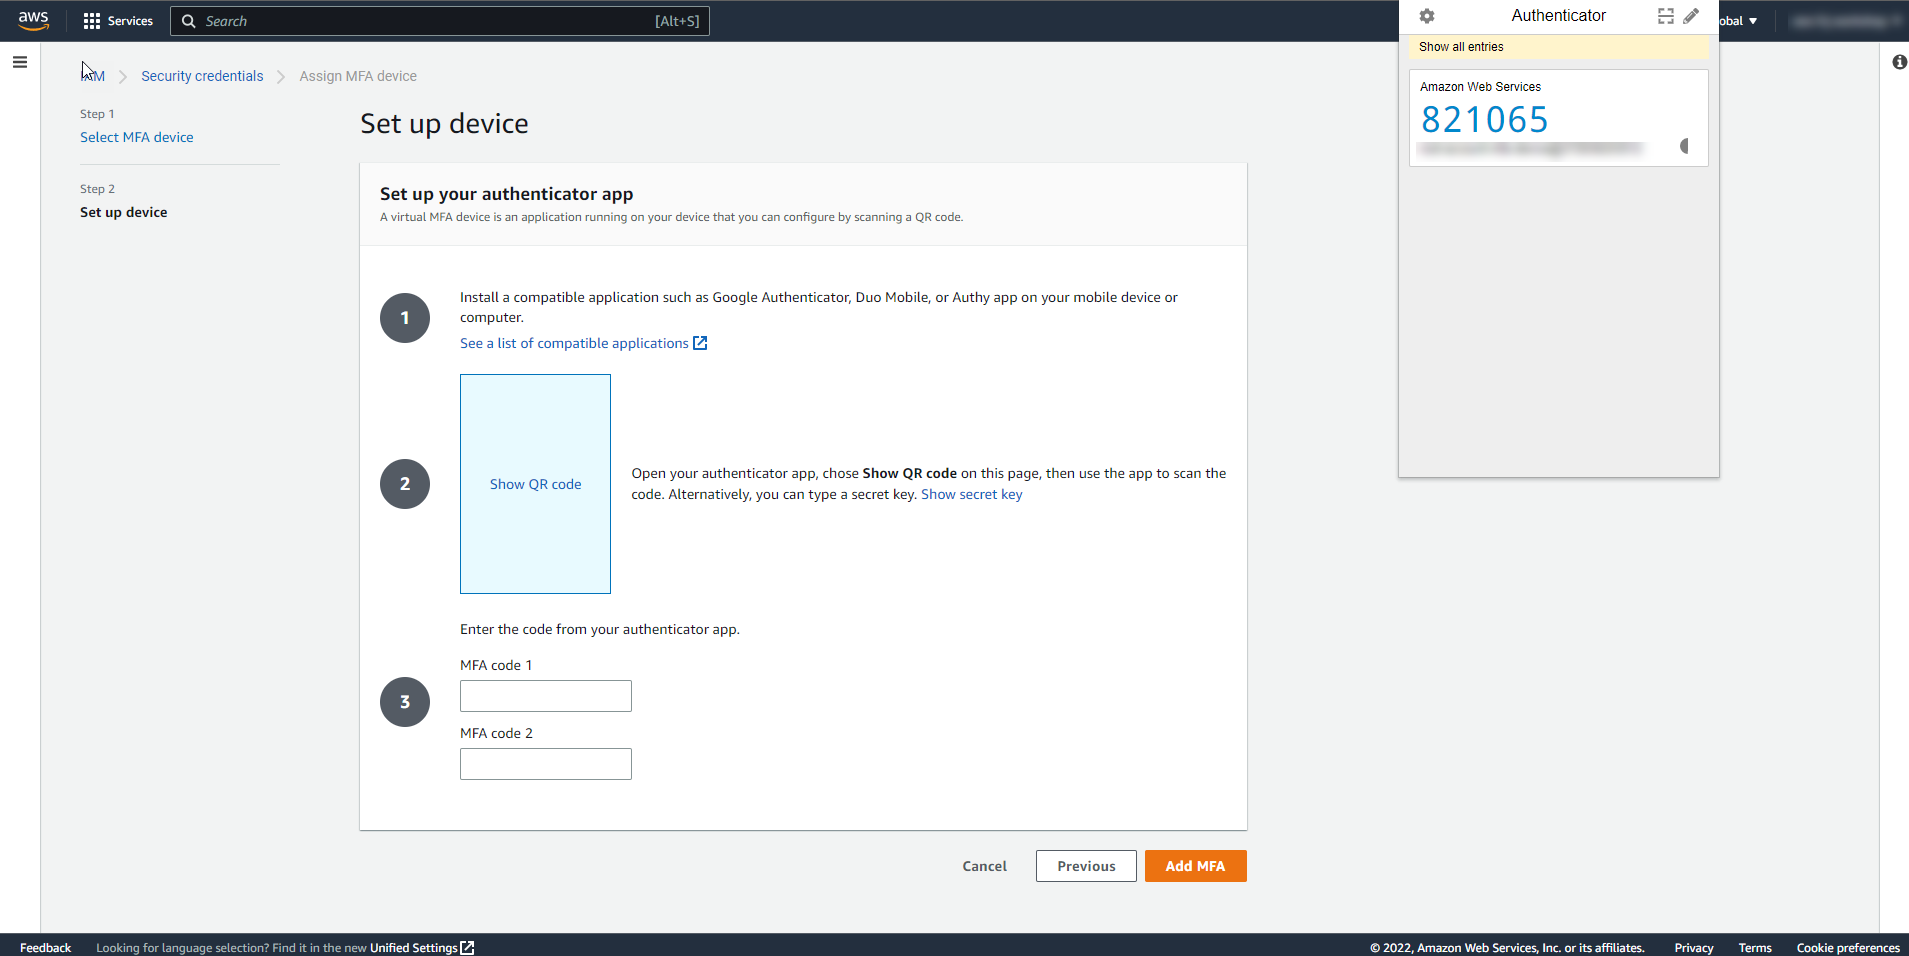
Install a compatible authenticator app on your smartphone. You can find a list of MFA-compatible apps here.
-
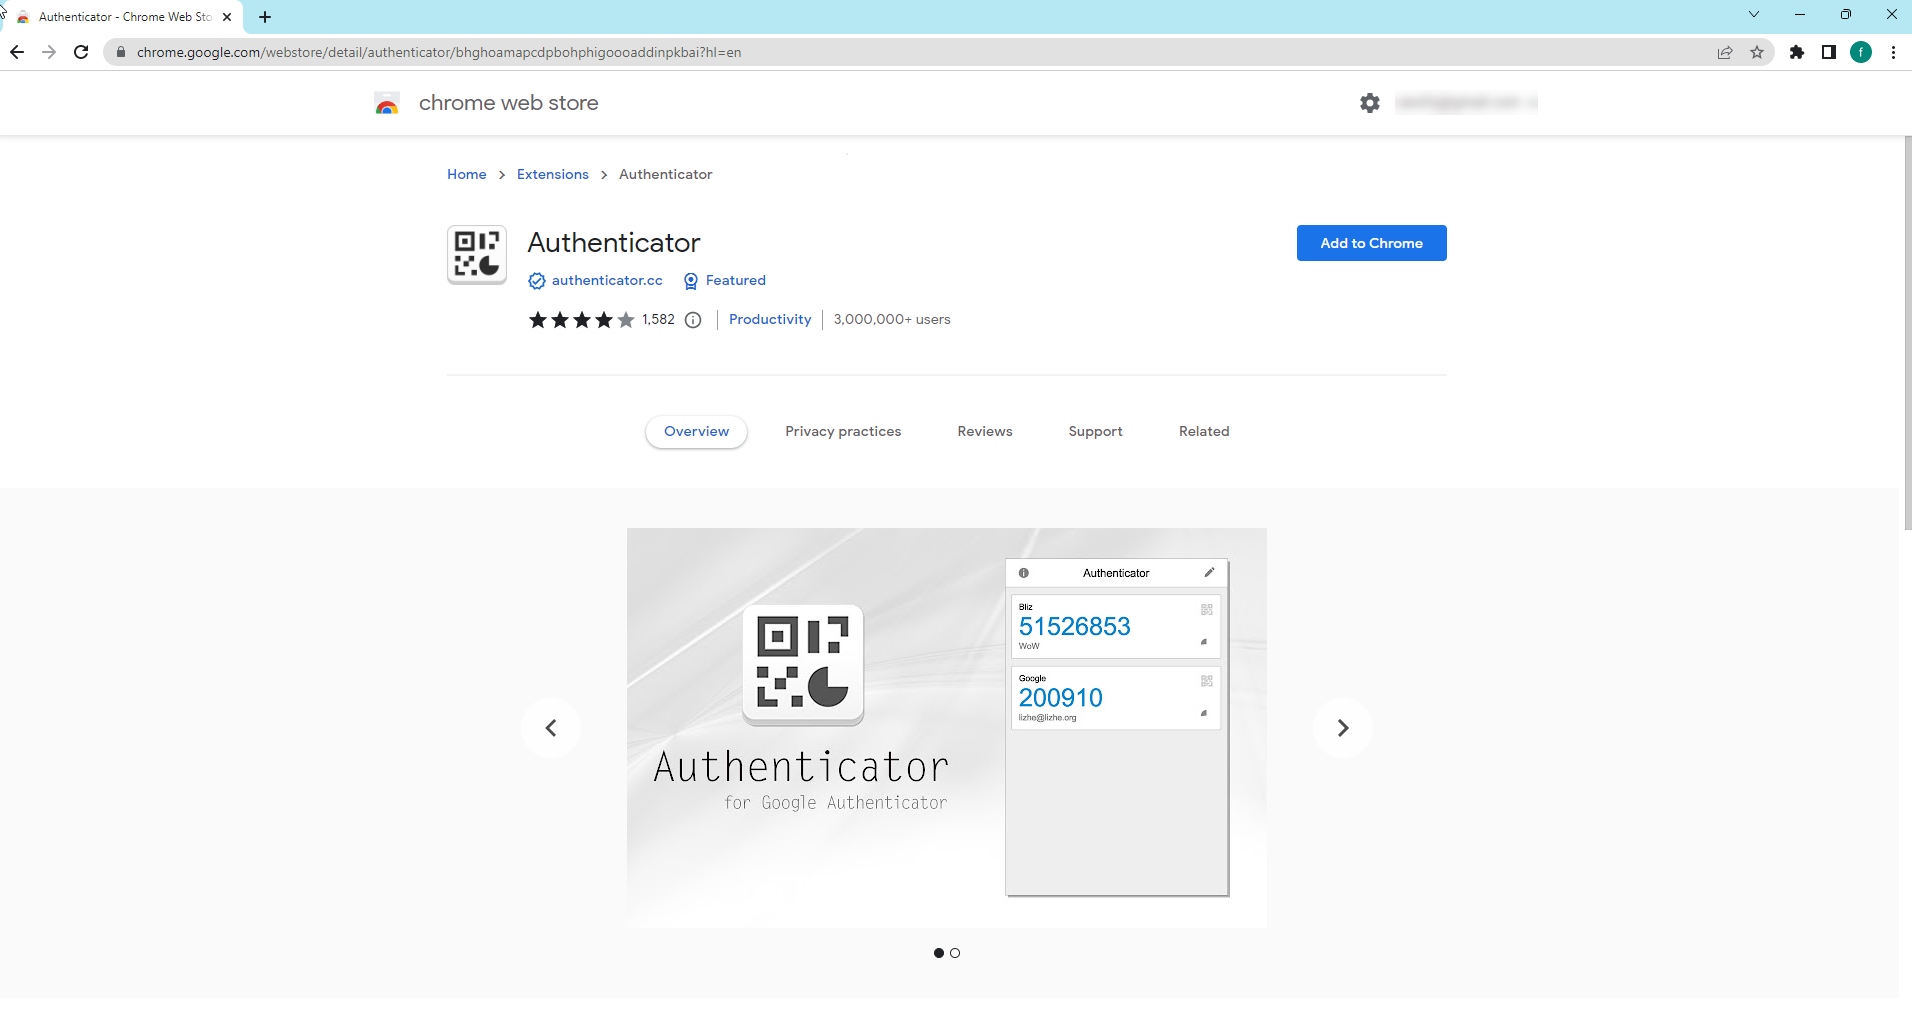
Install the authenticator extension for Google Chrome. Select Add to Chrome.
-
Use the authenticator app to generate an MFA code and enter it for confirmation.
-
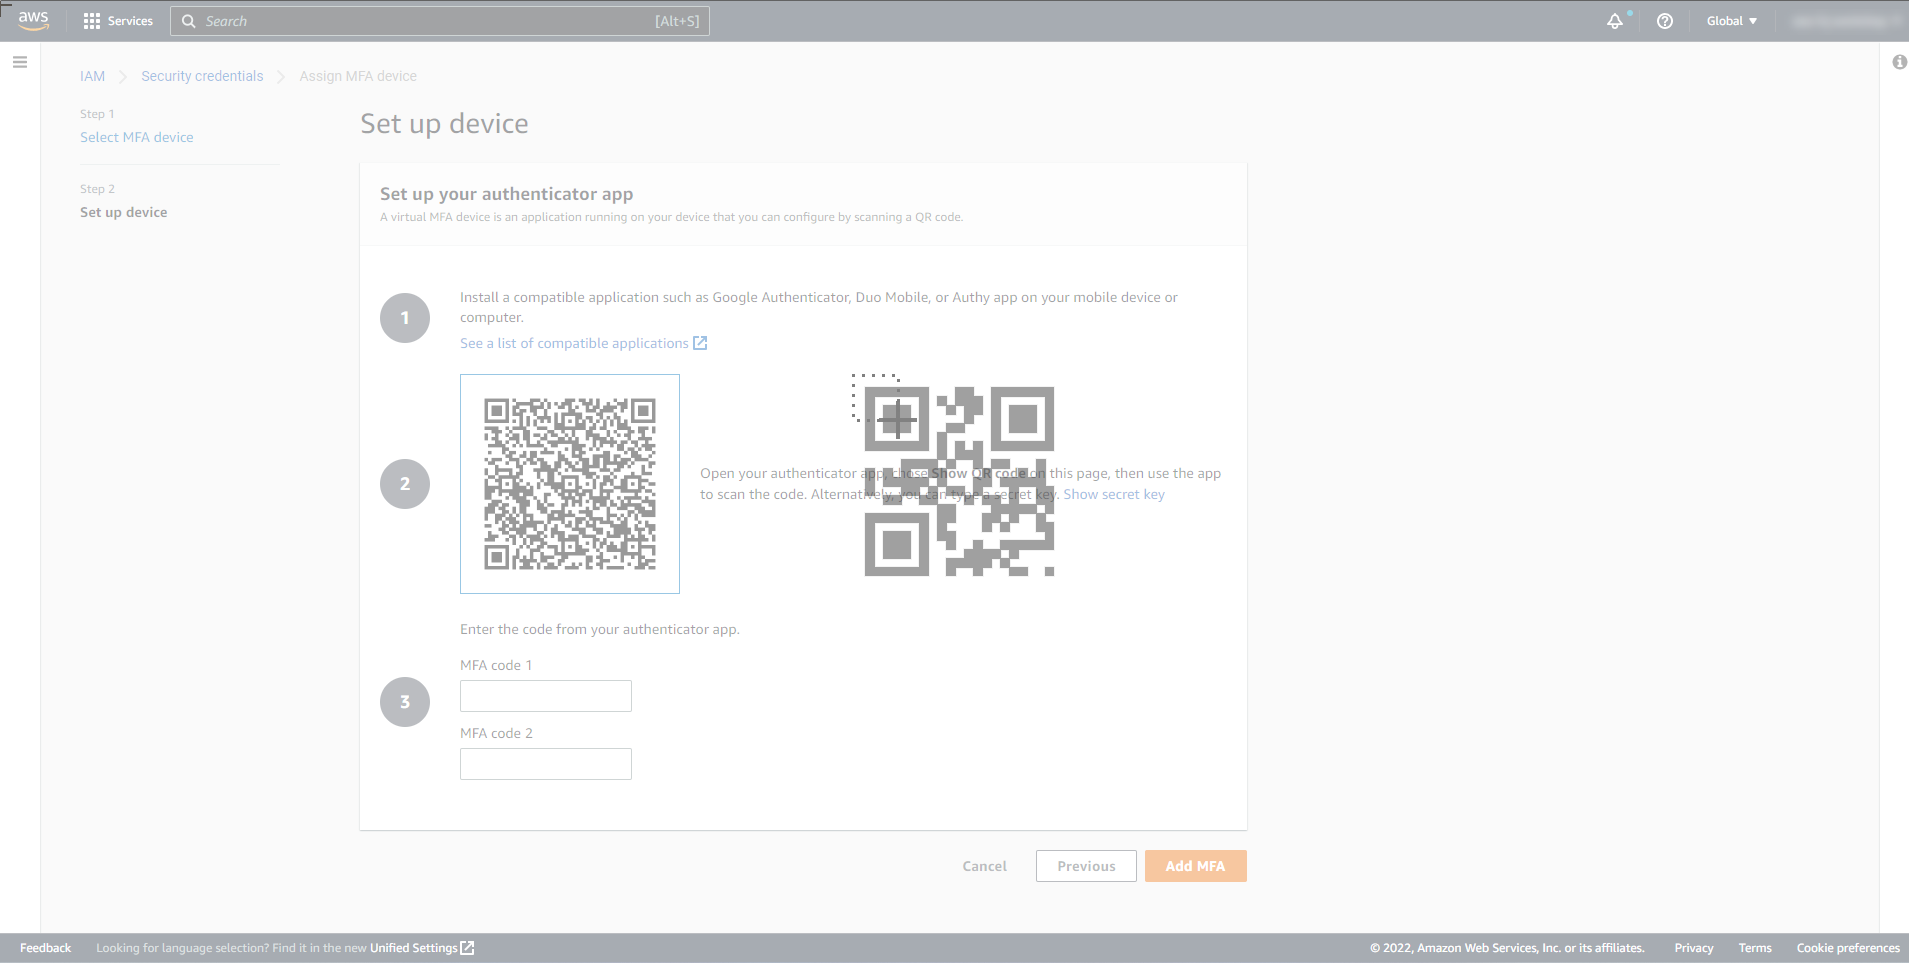
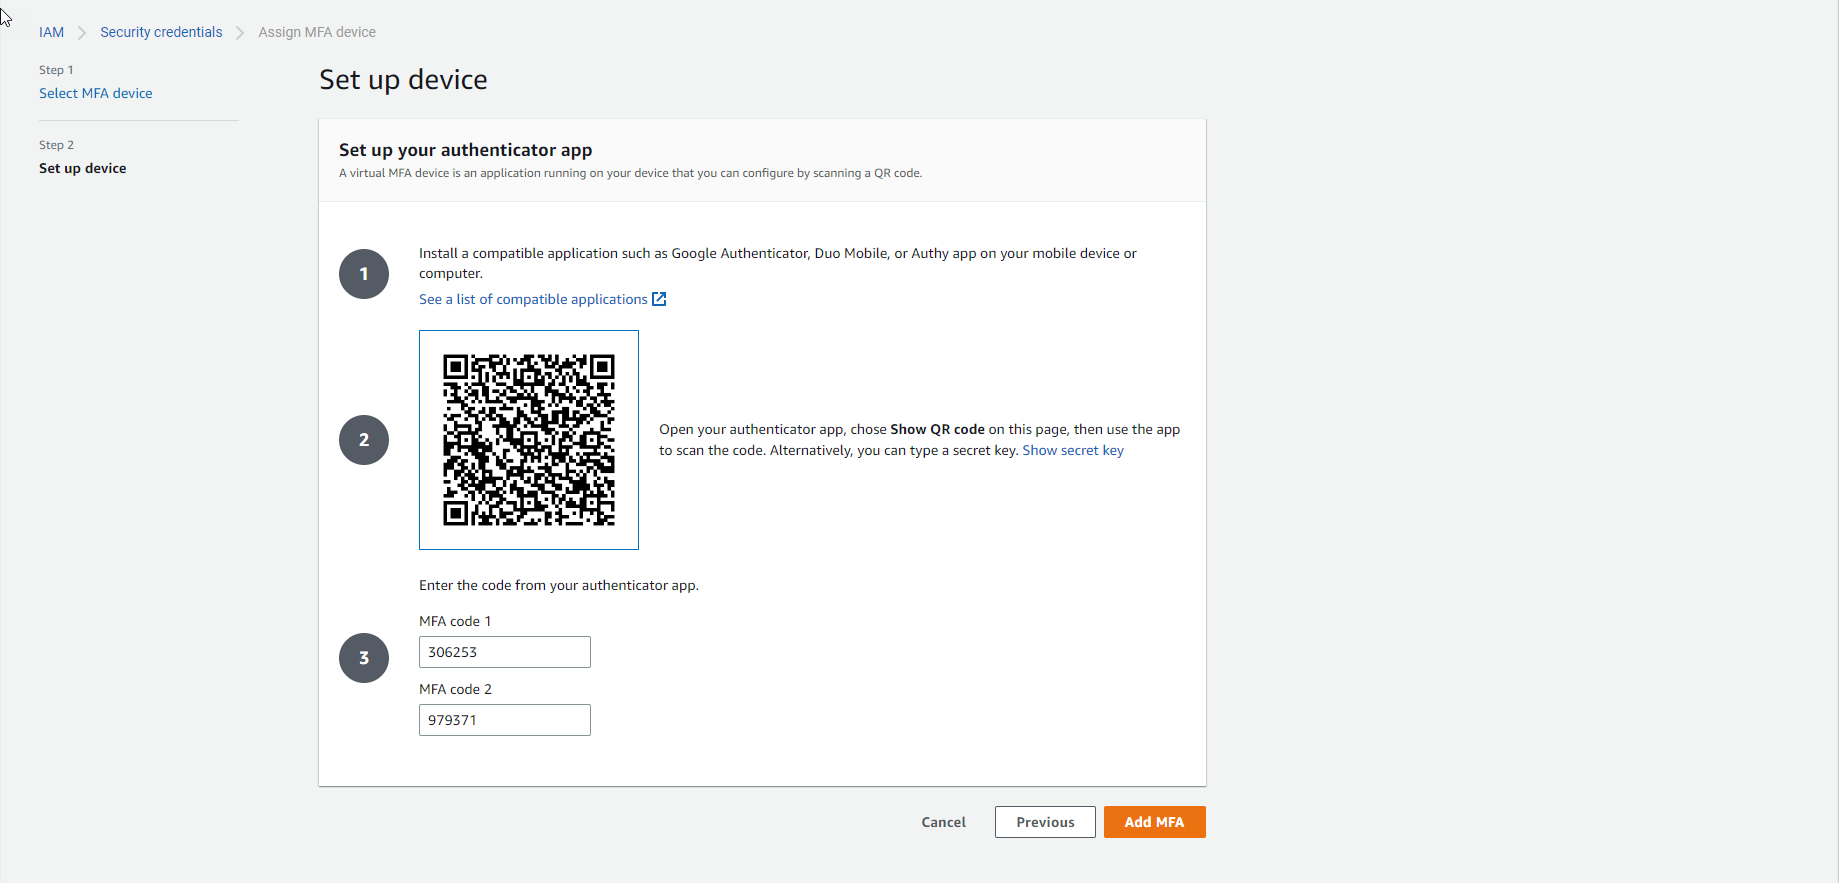
Perform a QR code scan using the authenticator app.
-
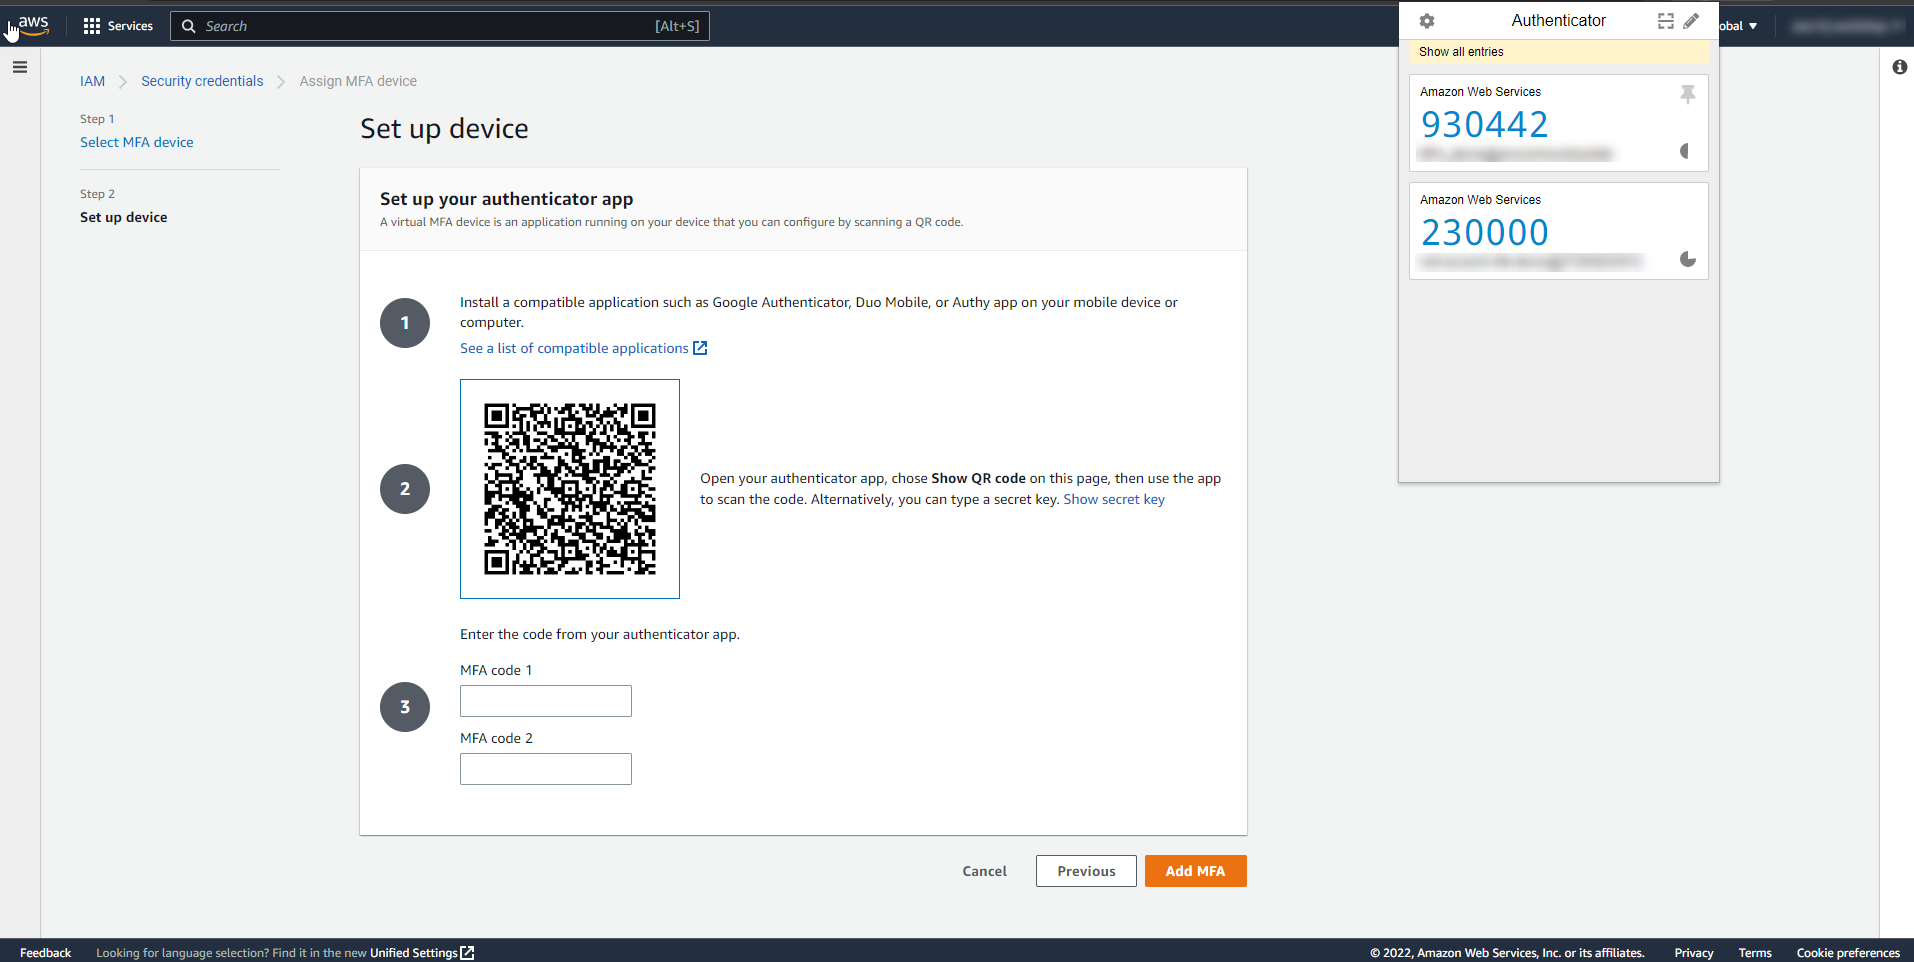
After scanning the QR code, enter the generated MFA codes into the corresponding fields.
-
Once the codes are entered, select Add MFA to complete the setup.
- Complete the additional MFA setup steps as prompted.
By setting up Multi-Factor Authentication, you add an extra layer of security to your AWS account, helping to protect your valuable resources and data.